Gear-obsessed editors choose every product we review. We may earn commission if you buy from a link. Why Trust Us?
Our simple method produces a gigantic, cool-looking work surface with a mid-century influence. 15mm Plywood

I was a college senior as the pandemic closed the world down in 2020, but by then I already knew I would be spending a lot of time at a desk, probably at home. The future of office-based work looked doubtful. The problem was that finding a piece of furniture to suit my needs and budget was impossible. So I took matters into my own hands.
In my sketchbook, I designed a piece of furniture using Ikea components and lumber. I took its inspiration from mid-century modern credenzas, but under the hood I wanted it to have all the high-tech considerations necessary for the work I do as a digital designer. And it was equally important to me that the desk had to be a nice piece of furniture, something worth sitting at each day. I’m not a woodworker, so it needed to be simple to build and affordable.
Maybe those goals were contradictory, but I built a prototype of the desk I designed and used it daily for the last three years. But there were aspects of it that I knew I could improve. The original desk used oak flooring as the work top. I wanted a smoother and more consistent surface, and I wanted a better arrangement of its storage space. I went back to the sketchbook and collaborated with colleague Roy Berendsohn in bringing Popular Mechanics an updated Version 2.0 of the Ikea desk hack.
The new desk provides 15 square feet of uncluttered and productivity-enhancing work surface. Below that, the two Ikea cabinets provide eight cubic feet of storage space. All cables are hidden and neatly arranged and a ventilation fan expels heat out the bottom of the cabinet on the right which hides a PC. The desk’s construction is split into three areas: The left cabinet has two generously sized drawers; there’s a central seating space; and to the right is a cabinet with two doors. Spanning the two cabinets is a 1-1/2 inch-thick top laminated from a 3/4-inch sheet of A1 oak veneer plywood.
Below, I list a few tools that can help you build such a desk, and further down we review the step-by-step process of how you can build one yourself.
To begin, I ordered a pair of Ikea Sektion cabinets (see our full Ikea shopping list here). The left unit is a simple box with a pair of drawers; the right unit is a simple box with a set of doors. There isn’t much to assembling these, just your typical Ikea instructions. Take it slow and pay attention to the orientation of their diagrams.
Assemble the parts as required using a manual screwdriver. We avoided a cordless drill to prevent over-tightening any fasteners or even a blowout in the particle board. We found a variety of screwdriver sizes and a mallet useful for some steps.
The Ikea cabinet configurations are designed to be fully customizable and modular to suit your needs. My needs were two oversized drawers and a cabinet with two doors. Your needs may be completely different.
But things don’t always work out as planned. We assembled the two-drawer cabinet only to find that the face of the bottom drawer was 5/8 inch too high. The drawer face closed against the face of the drawer above. To solve that problem, we simply plugged the existing holes and measured down 5/8 inch and re-drilled a 5/16-inch hole. For maximum precision in positioning and making these new holes, we marked their location with a spring-loaded center punch and used a drill guide block locked into place with a clamp.
For a perfectly seamless look we plugged the remaining holes with cover caps, as seen in the full shopping list.
In the spirit of taking matters into my own hands, what serves as the desktop surface can is fully customizable. We went this route for a few reasons.
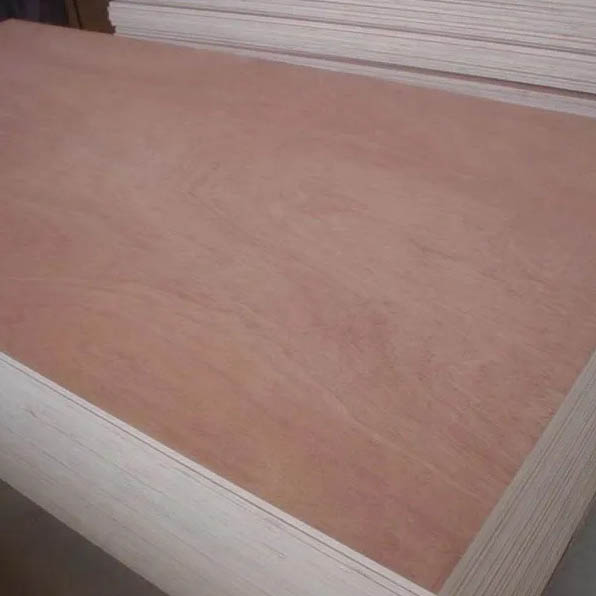
Price: This 3/4-inch 4x8 sheet of furniture grade plywood (A1 Oak, $100) had a near-finished face when we picked it up. Ripping the sheet in half and laminating the two pieces together for a 1-1/2-inch-thick top is highly attractive and cost-effective.
Length: Keeping the entire desk assembly under 8 feet allows a wide array of standard-length sheet good options. The longer you go past 8 feet, the more complicated your options.
Look: Harkening back to the mid-century modern influence and embracing the exposed plywood layers was the look I was after. Deliberate staining and finishing accentuated that look.
Alternatives: If it’s flat and has the correct dimensions, it can be a desktop. Some of the other materials you might consider are butcher block, MDF panels, and tongue and groove flooring.
The plywood sheet we used to make the top was a higher-grade material than you will find in a home center. Our sheet measured 48-3/4 inches wide and 97 inches long (a typical sheet of plywood is 48 inches wide by 96 inches long). This allowed us to rip the sheet right down the middle and have a top that was 24 inches wide. This matched the cabinet depth perfectly.
To achieve the 1-1/2 inch thick lamination, we spread a generous amount of fast-drying carpenter’s yellow wood glue on its inside surfaces then folded the pieces of plywood together, aligned their edges and drove 1-1-4 inch coarse-thread drywall screws through the bottom of the pair in a grid formation for even clamping pressure. We let the glue dry for a couple of hours then crosscut the top to 90 inches, removing (roughly) 3 inches from each end.
Even being as careful as possible it may be difficult to align all four edges during glue-up; it wasn’t perfect. Sanding to a smooth, square, and straight edge along eight feet is easier than you may think without a full-blown woodshop. We found a no-fail way to do it using nothing more than a random orbit sander. Clamp two pieces of straight wood to both sides of the top to form a long supporting surface. Then smooth the sawn edges of the top starting with 60 grit and moving through 80, 120, 150, 220 and 320 grits. This delivered us a beautiful glass-smooth edge comfortable for your forearms with no risk of splinters.
We used a Ryobi 6-1/2 inch track saw to crosscut the top to 90 inches long.
After the top was crosscut, we clamped two boards to the top to provide support for a Bosch random orbit sander. This produced a straight, square, smooth surface on all four edges.
We took our last sanding pass using a 320-grit disk. After wiping off the sanding dust, the top was ready for finish.
The top and bottom faces were given a pass of 180, 220 and 320 grit using a random orbit sander being highly cautious of the fragile and thin veneer. To round over the edges and corners we switched to hand sanding with 320. After vacuuming the surface clean, we used a tack cloth to remove sanding dust and stray abrasive grit to prepare for finishing.
We used a hidden section of the underside to experiment with different stains, finishes, and techniques. Our final recipe may seem over-engineered but it provided equal parts protection, texture, color, and sheen. We ended up loving it. Because the finish is so thin, however, it’s especially important to vacuum and tack cloth between each of these steps for a flawless finish.
Start by applying a blend of two Varathane oil stains with a rag, wiping away excess. The mixture consisted of 25 percent Premium Sunbleached stain and 75 percent Classic Natural. After that dried, we applied two coats Varathane Oil Clear Satin polyurethane, diluted 50/50 with mineral spirits. When brushed on, this diluted-strength finish was easy to apply and penetrated deeply into the oak veneer. After each coat is fully dry scuff using a Gray Scotch Brite Ultra Fine Pad. Paste wax came next for extra sheen and protection.
The resulting finish is lustrous and has a subtle tone that complements the white cabinets. It provides moderate protection from incidental moisture, such as coffee rings. But if some liquid does stain the top, the finish is easy to repair with another application of finish at some future date.
To ready the top and base cabinets for installation, we installed four 10-inch legs on each cabinet by driving their screws (included) through the holes in the mounting flanges into the bottom panel of each base cabinet. The legs are offset 1-1/2 inches from each corner and rotated accordingly to avoid mounting screws hitting cabinet hardware.
With the right and left cabinets standing upright we prepared to attach the top. We placed the top on one end of the cabinet flush with all three edges and used clamps to secure it. From the inside of the cabinet below, we drove 1-1/4 inch drywall screws up through the cabinets into the plywood top in each corner. That was repeated on the other side for a perfectly square final assembly.
The legs have 1/2 inch of thread adjustability in the feet to account for floor unevenness. We adjusted them to make sure the desk was level in all directions. This helps the drawers open more smoothly and keeps objects from rolling off.
Up to this point, we’ve made a very fine piece of custom furniture for just over $600. What comes next are additions that really make it a one of one. Achieving a clean, attractive look meant that cable management was a high priority. Hidden inside the right set of doors is a custom-built PC desktop that is not only completely out of sight but is silent, dust-free, safe, kept cool, and fully hands-off.
The four add-ons below, along with the full list of accessories, were installed to effectively hide the essential wires while also keeping them accessible to replace or adjust:
We used cable grommets at each access hole to provide a neater appearance and to prevent a rough edge on the hole’s perimeter from damaging the cable’s sheath.
Use a high quality clamp-on monitor mount to free up desk space that an ordinary base would take up.
To cool a hidden desktop computer inside the right cabinet, we used dual 120mm AV cabinet fans that exhausts air when the computer powers up.
This $7 external button is a sleek way to turn on power for that hidden computer–without the need to open the door.
When the desk was complete and all the computer gear wired up, I stood back and took a long look at the project. It was simple in the sense that it required only basic woodworking skills, but at the same time, I think it does have an authentic mid-century modern aesthetic. That I could bring those two together was something I hadn’t expected: fun.
Tom Messina is a multidisciplinary graphic designer and editor bringing his years of experience to Hearst Magazines' Enthusiast Group of publications. With a maker mentality at his core, his knowledge spans to furniture making and repairing, chair collecting, mid-century design, mural painting, pizza baking, 3d printing, and sample recognizing.
How to Make a DIY Side Grain Cutting Board
Make Your Own Smoker Out of a 55-Gallon Barrel
How to Make a Forge and Start Hammering Metal
Start Gardening Early By Building This Cold Frame
How To Make a Box
How To Build This DIY Welding Cart
Make a DIY Cigar Box Florescent Rock Display
Say Goodbye to Your Boring Bookcase
Make a Simple Hardwood Cutting Board
Classic Popular Mechanics DIY Christmas Displays
How to Make a Simple, DIY Wireless Fast Charger
How To Build a Backyard Fire Pit
A Part of Hearst Digital Media
We may earn commission from links on this page, but we only recommend products we back.
Wood Chipboard ©2023 Hearst Magazine Media, Inc. All Rights Reserved.